Bluesky makes it pretty easy to use your domain name as a custom handle, you just need to update your website’s DNS record with a custom field (instructions here). If you have a WordPress.com domain (like me), it might not be immediately obvious how to do that, but it’s actually quite simple.
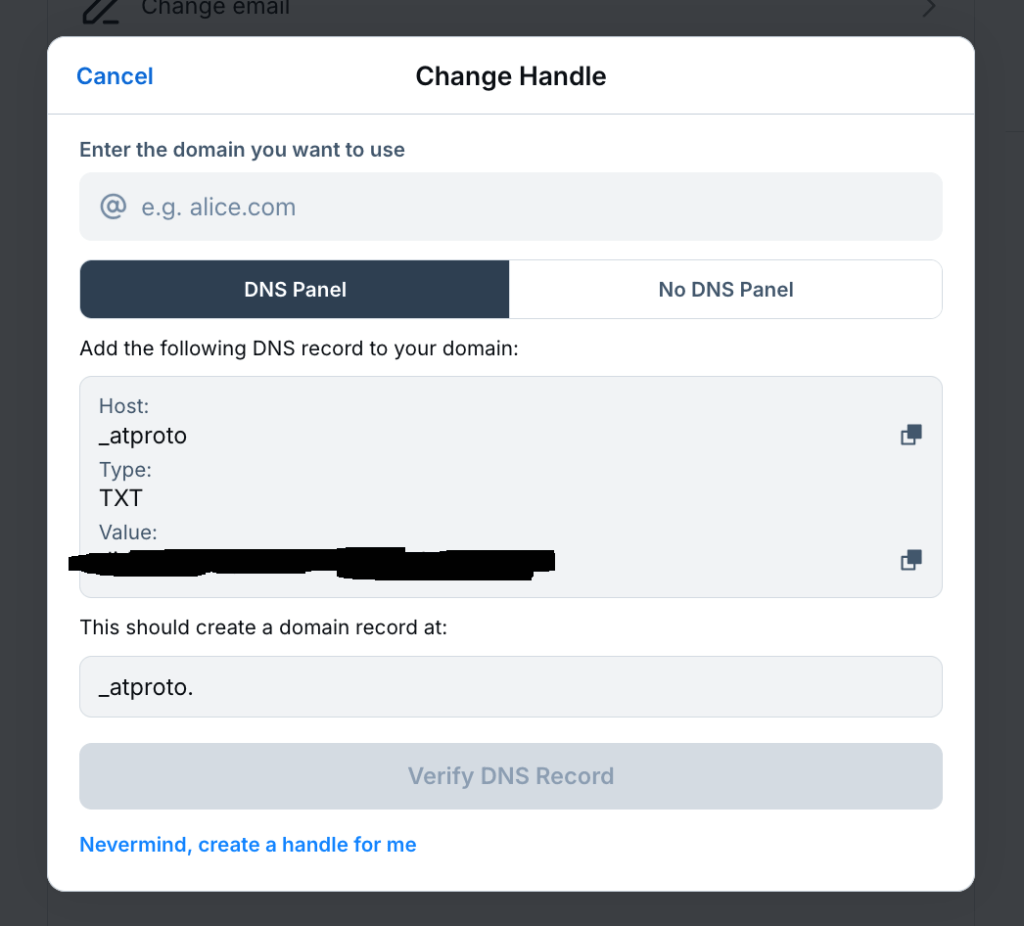
First, go to to your Bluesky profile to get the entry you need to add. You’ll find this under Settings -> Account -> Handle -> I have my own domain. You’ll get a screen like this (you’ll have a unique string to add in the “Value” section):
Add your domain in the top box, so for my domain it looks like this:
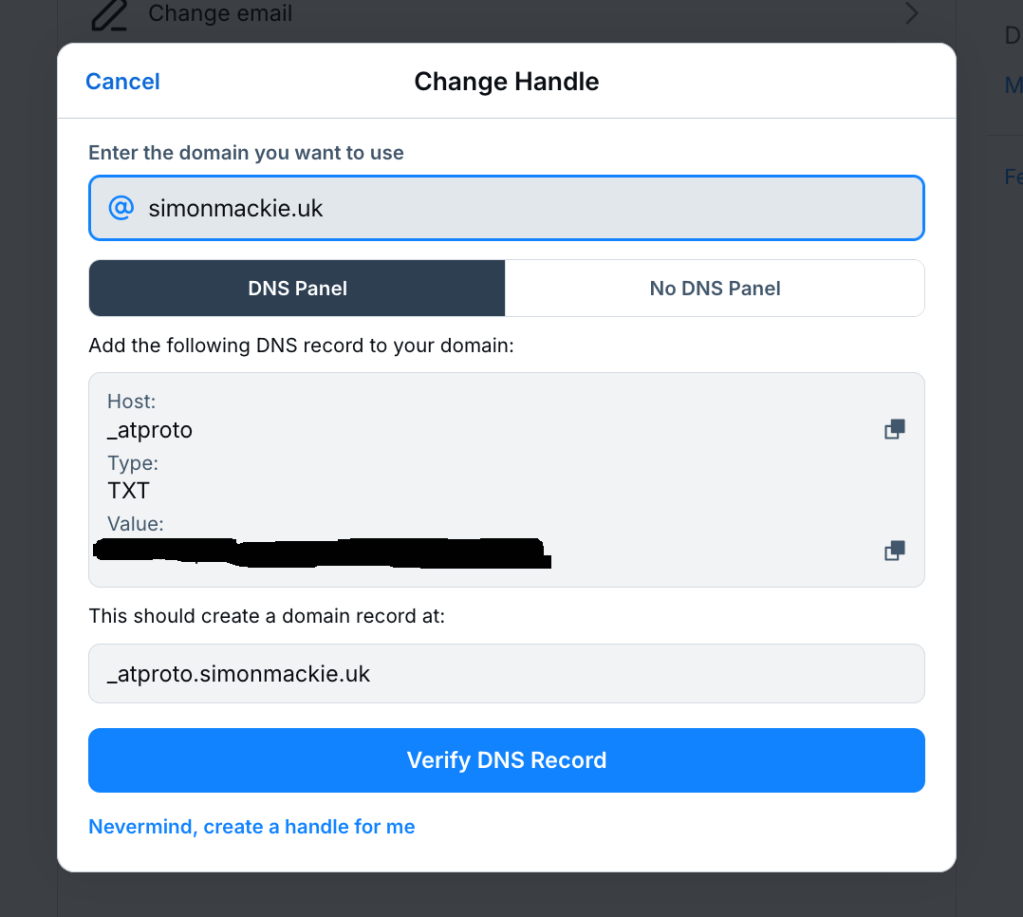
This updated the values in the boxes below. You;ll use these to update your DNS record. Don’t click Verify yet, you need to update the DNS record first.
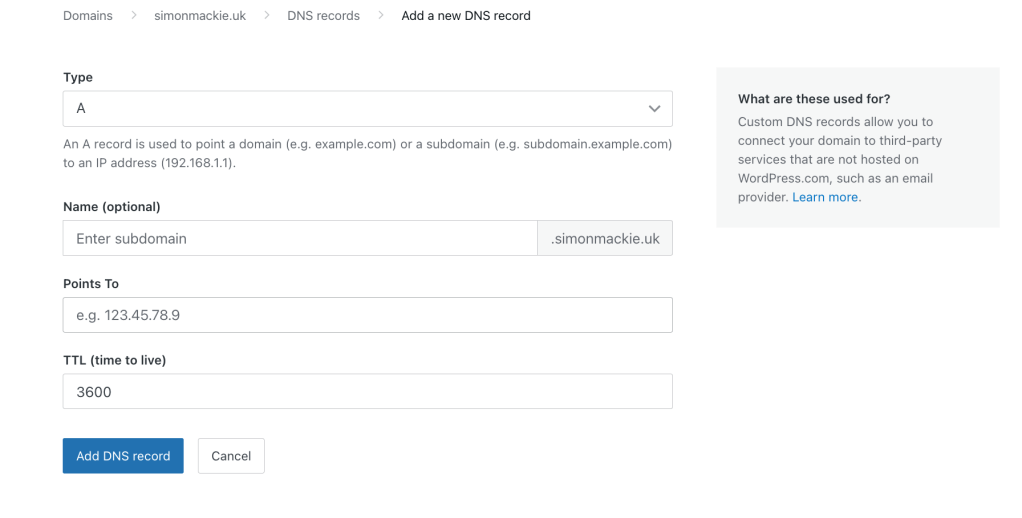
Now go into WordPress.com, and in the left-hand sidebar, go to Upgrades->Domains. Then select your domain (it needs to match the domain you entered in the Bluesky Change Handle dialog), and go to DNS Records->Manage, and tghen click on Add a record. You’ll get a screen that looks like this:
You need to add the details from Bluesky’s Change Handle screen in here. First, change the Type dropdown to TXT, then add “_atproto” in the Name field. In the Text field, paste the Value from Bluesky’s Change Handle screen. It should look like this:
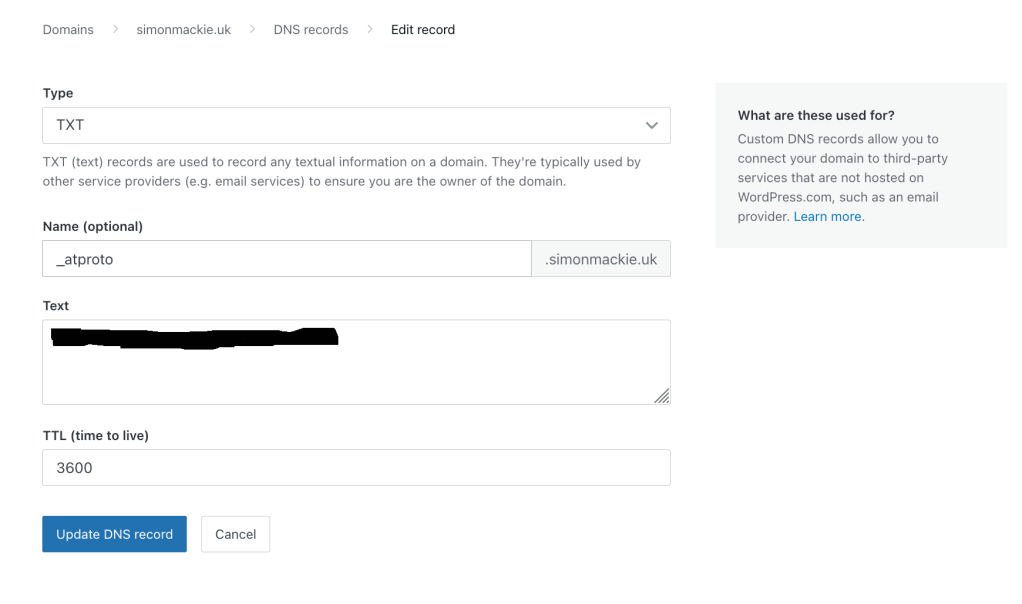
Once that’s done, click Update DNS record, it should appear on your DNS records screen (if you made a mistake you can always edit it by clicking thre three dots to the right of the recod and then clicking Edit). Once it’s set up, you can then go into the Bluesky Change Handle screen and click Verify DNS Record , and voilà, you shoud now have a custom handle!
